Repairs and clean-up to do before you move into a new apartment

The discerning New Yorker knows to scrutinize a potential apartment very closely, but it's often inevitable to encounter "surprises" once you move into a new place. Particularly in older and well-loved units, grime has a way of hiding, and necessary fixes can catch you off guard, whether it's charred bits of food hidden beneath your stove burners, or walls pocked with dents and dings from previous tenants. Not to worry, though: Even if you aren't handy, there are plenty of small repairs and clean-up tasks you can (and should) handle DIY-style before you settle into your new home.
DIY for renters versus owners
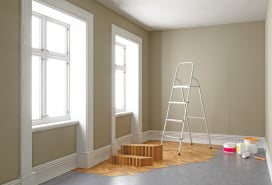
First, it's important to note that renters should tread much more carefully than owners when it comes to apartment fixes. As the New York Rent Guidelines Board notes, most leases forbid alterations to rental units if you don't have the landlord's okay. Even putting up a new coat of paint is generally the responsibility of your landlord or management company—though if you want a different color, you can do that yourself but are expected to repaint your walls white once you move out.
If your landlord is unresponsive about work you need done, you have several option (check out this Brick article for more information). And depending on your relationship with him or her, you may be able to get away with taking matters into your own hands. Veronica Raehse, a sales manager with the real estate firm Bond New York, recalls living in one rental where she handled little repairs on her own: "Since it was such a competitive rent and they never raised it, I didn't want to bother them because they were treating me well, so I just did things myself."
Owners, by contrast, have a lot more freedom in terms of making alterations to their home, but Raehse stresses that they should still keep their fix-it work to small tasks rather than large-scale renovations. For instance, in many NYC homes, the windows need to be cleaned right away, a task owners should leave to building management. "It seems dangerous to do it yourself," she says.
To start, banish unwanted gifts—and guests—before you settle in
• Get rid of abandoned property: It's not unheard of to "inherit" some of the previous tenant's belongings, and while you might be happy to hold onto the odd lamp, you probably don't want to deal with handling abandoned property when you're busy trying to sort through your own. According to Nolo, New York renters should take an inventory of what's been left behind, store it, and let their predecessor know they have 30 days to pick it up. If the previous tenant fails to reclaim their stuff, you can trash it, or, if you think it has value, try to sell it.
• Clean to prevent pests from proliferating: You might also find yourself inheriting "squatters" in the form of bugs and rodents. Shandy Ramos, operations manager for the residential and commercial cleaning company Klean Freaks, suggests a thorough vacuuming and sanitizing of the insides of closets, cabinets, and drawers, as these are the spots pests most like to hide (and are easy to overlook when you're in the midst of apartment hunting.)
"Telltale signs would be small coffee ground-like crumbles within the drawers, and brown specks along the tops of door frames and inside cabinet doors. One may also wipe the inside of a drawer with a damp white paper towel and actually be able to see shed pieces of legs and shell stuck to the paper," she explains.
You'll also want to sweep and mop the floors, and wipe down baseboards, door frames, and windowsills. Plus, "fully clean and sanitize the inside of ovens and refrigerators - you just don't know the cleaning habits of who was there before you, or what type of 'experiments' may have been growing in the fridge," Ramos says. "Don't forget the broiler drawer of the oven, and most stove tops lift up to reveal some nice surprises, such as some burnt macaroni hidden beneath the burners."
Such crumbs and grime are enticing to roaches and mice, so it's best to do some thorough, preventative scrubbing right away—no matter how clean the place looks.
As for bed bugs, per regulations, your landlord or, if you're an owner of a co-op, management company, are bound to disclose the presence—past and present—of bed bugs to you before you signed on the dotted line. (Read more on finding an apartment without bed bugs.) If you're especially concerned, it may be worth it to have a pest management expert bring in a be bug-sniffing dog to suss out the place first before you plant roots.
Beautify your space
• Smooth over dings and dents in the walls: "When you view an apartment and it's staged, the minute the furniture is out it can look like a mess," Raehse says. "Everybody does a good scurbbing and scouring when they move in."
Once your place is sparkling, the next step is to enhance its style a bit. Raehse says she has worked with agents who give every new homeowner a tool kit as a housewarming present, making it easier for them to hang artwork and window treatments, or even fix the grouting on their bathtub, tasks that can be tedious but are also usually manageable for non-professionals.
Before you display your photos and paintings, though, you'll want to patch up any holes left behind by the previous tenants. Small dents and dings from nails can be quickly filled in with spackling paste, and then smoothed over with a sponge. Larger holes take a bit more effort, but are nevertheless doable for amateurs; take a look at this how-to from Lowe's.
First-time homeowners may want to opt for learning how to handle such tasks themselves, Raehse says, after making a hefty down payment: "Some people feel, 'I just put 25 percent down and I'm going to have to eat rice and beans for the rest of my life,'" she says. "There's a lot the thrifty-minded can do themselves."
• Hang your artwork: Fortunately, putting up artwork is relatively painless. There are tools both analog and digital that help you hang pictures evenly--you can pick up a level at any hardware store, or download an app to your smartphone that calibrates to show you when your artwork is hanging exactly straight. And if you want to go all out and assemble a gallery wall, take a look at Brick's how-to here.
Fraser Patterson, founder of Bolster (FYI, a Brick sponsor), says that hanging artwork is a low-risk proposition: "The worst thing that can go wrong is a hole in the wall," he says.
• Buff your bathroom: First you'll want to take care to give your bathroom a good scrubbing; Ramos recommends sanitizing all surfaces‚from the sink to the toilet to the bath fixtures—and scrubbing away any mildew on grout and tile. (Better yet, install new toilet seat covers so you can start, ahem, fresh; it's a 10-minute job, tops—not including the trip to the hardware store to get the new seats.)
If the caulk around your tub looks dingy and mildewed, refreshing it shouldn't take more than an hour of your time: According to This Old House, all you need to do is remove the old caulking, scrub it clean, and re-fill the gap, using painter's tape to keep it even. Then, wait at least 24 hours before showering to let the new filler set.
Patterson points out another, even easier bathroom upgrade: fog-proof mirrors. Instead of spending money on a new mirror, you can spray the one you have with a product like Rain-X. (This is a great, easy upgrade if you're already settled in, too.)
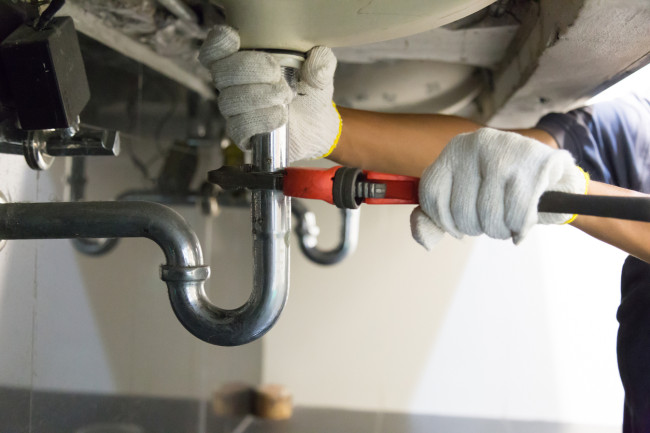
Furthermore, he adds, most drain clogs are easy to fix, and need only a plunger rather than a plumber. How Stuff Works breaks down the plunging process with illustrations; you'll also find instructions for how to break up clogs with household products like baking soda and vinegar.
Stay safe
• Install smoke and carbon monoxide detectors: Make sure your smoke and carbon monoxide detectors are working. The city Department of Housing Preservation and Development requires that all homes have at least one installed and functioning, and that they are replaced within 30 days of breaking. How Stuff Works points out that battery-operated detectors may be better than plug-ins, as they'll continue to operate during power outages, and notes that there should be at least one on every floor, and ideally, outside each sleeping area in your apartment. Fortunately, installing them is easy, and just requires quick work with a power drill; check out WikiHow's illustrated guide here.
Take care, though, that you know what's behind the wall you're drilling into. "You dont want to drill through any electrical or waste supply," Patterson cautions. "You can encounter the odd gas pipe in buildings in New York, and that's not fun to drill through."
• Know your limits: "If you have a beautiful home you just renovated for half a million, do nothing," Patterson says. "Otherwise, it's like getting a tailored suit and then sewing it yourself."
Plus, he points out, even seemingly simple tasks like painting can turn out to be more complex—and costly—than you might have anticipated. "I've seen a lot of bad paint jobs gone very wrong. I know someone who spilled paint and damaged a $20,000 floor," says Patterson. "A lot of homeowners don't realize what it takes to prepare house properly for painting."
A good rule of thumb, if you can't decide whether to proceed with any fix-it task, is to ask yourself how easy it would be to deal with mistakes made in the process. "Anything requiring you to take a risk where if it goes wrong, it's not fixable by a professional--stop working," Patterson says.
You Might Also Like


