5 foolproof steps to painting any room—successfully

As far as DIY projects go, painting is one of the most basic, and probably something everyone will do at some point. But before you pick up that roller, take these steps to make sure you do it right--and with the fewest hassles possible.
1. Empty the room
Clear out any items in the room that you don’t want damaged or dirty. Anything you can't haul out the door, move to the center and cover with a tarp or plastic sheets. Give yourself plenty of time: this stage always takes longer than you expect.
2. Patch holes
To get a smooth surface on your walls, you'll want to fill in any holes or loose pieces of paint or plaster. For this, you'll need a putty knife, patching compound, a wall hand sander and sandpaper in two different strengths, 120 grit and the coarser 100 grit. (Pro tip: a 14-in-1 painter's tool performs a lot of these functions and more.)
First, you'll want to overfill the holes with the patching compound, then "feather" the excess with the putty knife, and let it dry. Take the finer sandpaper and sand down any rough edges.
Then sand down the whole room with the coarser sandpaper, which gets rid of any bumps and "keys" them up, providing a rougher overall surface for the paint to adhere to.

Wipe down the walls with a Swiffer mop pad and warm water
3. Clean the space
Giving the room a thorough clean before painting is important so that you don't get any dust or debris sticking to the wet paint. Sweep or vacuum the floor, and wipe down the walls with warm water mixed with a few drops of dish detergent. This will act as a degreaser, ensuring the paint is going on a squeaky clean surface.
To reach high spots, you can use a Swiffer sweeper and mopping pads, or use wet rags on a broom.

A four-foot band of paper is enough to protect the floor from paint spatter
4. Protect the areas that won't get painted
For this, you'll need painter's tape, rollers, angled brushes, paint trays and liners, and a drop cloth, plastic sheets or paper as a floor covering. You may also need silicone caulk to seal gaps where the window, door frame or baseboards meet the wall. Pro tip: you can purchase painting kits which have a lot of supplies already packaged together.
First, lay down your floor covering and tape it down. Then use the painter's tape around door frames, window frames, outlets and light switches to provide a barrier from the paint.
Use the caulk on the gaps between the trim and the wall where the existing filler is missing or loose. (Don't be tempted to do the caulking earlier, even if it takes some time to dry, because in all likelihood you'll get dirt in it once you start cleaning it.)

Painting the edges and corners with an angled brush ensures good coverage
5. Paint!
This is what you were waiting for, right? Start at the ceiling, moving down. This way, any stray drips or sprays can be covered up.
First, "frame" each wall by using an angled brush on the corners and edges. Then use the roller on the rest of the wall, taking care that it glides along the surface. If it slips, you're using too much paint, and if it drags or sticks, you aren't using enough. Another tip? Most rollers can be attached to a broom or Swiffer handle, and often it's easier to use this to paint hard-to-reach spots, rather than using a ladder you have to constantly reposition.
Usually, two coats of paint will be enough. Follow the paint manufacturer's instructions on drying times between coats.

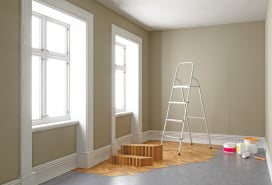
The painted room
Related:
NYC Renovation Chronicles: Revive a long, dark hallway with a two-tone paint job
NYC Renovation Chronicles: Strip decades of gloopy paint off your walls


