NYC Renovation Chronicles: How to give a custom built-in look to a $59 Ikea bookcase
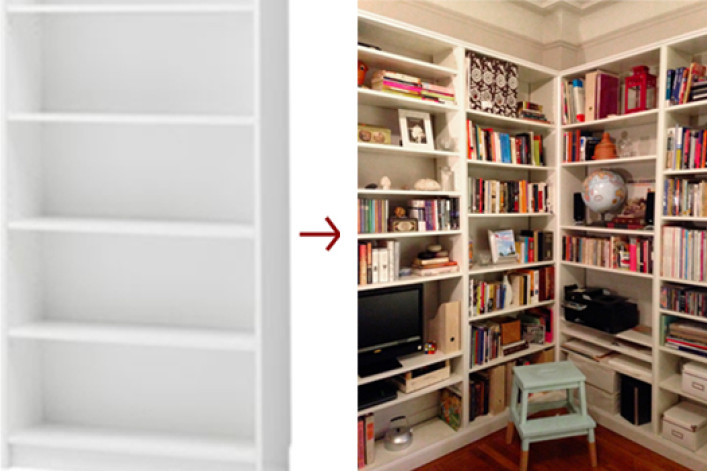
When we first moved into our apartment, we fell into a newbie decorating trap. We were basically setting up our new space to mirror our old apartment. The living room was comprised of the sofa /TV area, a desk stuck in the corner for a work space, and one wall taken up by a large bookcase full of books. And the dining room was just that: A room with a table and chairs for dining.
Eventually we re-worked the plan to make better use of the space. As recounted recently here, we decided to build a home office, which could also double as a tiny guest room. That left us with enough space for a comfortable living room for relaxing and entertaining. The dining room, then, had to embody some storage solutions, including the wall of books I had been dreaming of.
After finding some inspirational pictures online (here's one from my 'idea book' on houzz.com ) I set out to get some estimates for custom made bookcases to fill an entire corner of the dining room.
I got in touch with two carpenters recommended to me by acquaintances. I also contacted a furniture store that has several locations in the city and custom builds furniture. Those estimates ran upward of $750 for one 2 foot by 8 foot bookcase -- more if I wanted it painted. That was just for one unit and I was going to need at least three if I was going to use the whole corner!
So, we turned to store bought units. Instead of a 'built-in' look, we considered going modern. CB2 actually had a few options that would have worked well with the space. But those prices, times four, was still more than we wanted to spend (it would have come to about $1,600).
What to do? We didn't want to DIY, and HSI (Hiring Someone Instead) was proving too costly. So, we decided on the third way. We went to Ikea. We went for the good ol' Billy ($59.99 each).
The Empire of Ikea was basically built by Billy the Ubiquitous Bookcase. In production non-stop since 1978, these simple and stylish, unobtrusive and customizable units have been the budget friendly stalwart of book lovers the world over. They are space friendly, too: They are only 11 inches deep and have height extenders that allow you to maximize vertical space.
After purchasing the necessary units to fill the corner, we got to work on customizing them for our dining room.
First, we cut away the back of the bookcases so that they could accommodate our 15" high baseboards. Otherwise, the bookcases wouldn't lay flush against the wall. Billy bookcases come pre-cut to accommodate 3" baseboards, so all we had to do is take a jigsaw and extend the line of the pre-cut gap.
Next, we secured the bookcases to each other. Since we arranged the bookcases in an L shape, it was easy to drill corner brackets into place that ensured the bookcases wouldn't budge. We also drilled bolts through the adjoining bookcases so that the four Billy units essentially became one, big L shaped unit.
We placed the shelves at different heights, as needed. We also tossed the cardboard backing that came with the units, letting the wall behind show through. I think all this gives the units a more customized, more "built-in" look.
We were very happy with how that turned out. But then we decided to take it a bit further and add molding for an even more built-in look!
We went to Lowe's and bought a few lengths of inexpensive trim, like this one for the toekick. We also purchased a flat trim to cover the seams (where the individual units joined up), and another type of trim with a simple profile to finish the top of the bookcase.
Cutting the trim to size was fairly straightforward business. The only somewhat tricky part was creating miter joints. Since our bookcases were laid out in an L shape, we had to cut the horizontal running molding (running along the top and bottom) at 45 degree angle so they would create a corner where they met. But this was easy enough with our miter saw.
The rest were all simple straight cuts.
Then it was a matter of gluing. We opted to glue the molding because a) it was easier than using a nail and hammer, and b) we stockpile Power Grab adhesive over here and it’s more than up to the task of sticking up thin strips of molding.
For aesthetic reasons, I briefly toyed with the idea of plugging the holes for the shelving heights with caulk. But I decided that would be silly to do, since I may want to adjust the shelves one day.
And that was that. Instant built-ins!
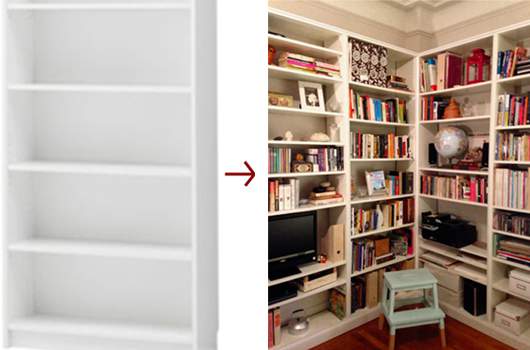
Mayra got the built-in bookcase look by combining and customizing four $59.99 Ikea bookcases. It cost about a quarter as much as professional built-ins.

After covering the seams, the four separate units work as a whole. And they blend in better with their pre-war apartment surroundings.
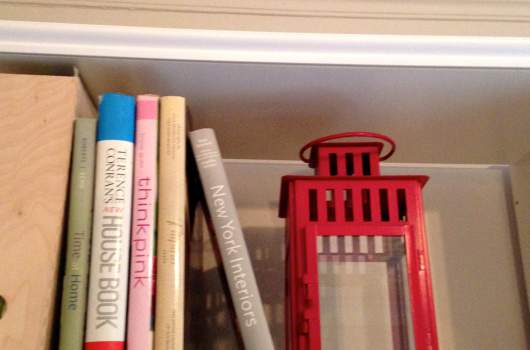
Mayra went for a very simple profile on the top trim. Having a bit of decoration matches with the existing picture rail and crown molding.
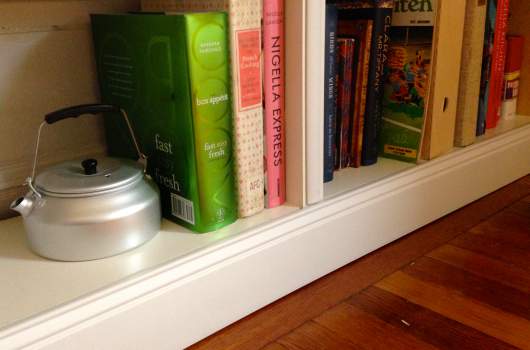
The added baseboards give the Billy's thin, modern lines a bit more substance and heft.
NYC Renovation Chronicles is a bi-weekly column focused (obviously) on renovation, NYC style. Helmed in the past by an architect, a kitchen and bath designer, and a general contractor, the column's new steward is co-op renovator, real estate porn addict and Harlem resident Mayra David. She'll focus on what it's like to DIY or HSI (= Hire Someone Instead) in NYC.
Related posts:
10 things I learned during my year-long renovation
Can't afford/find a two-bedroom apartment? The right one bedroom might work
5 things you may live to regret doing in your own apartment
10 first-time renovation mistakes even New Yorkers make
Want to renovate? Here's how to get the money
Here's why you may be overpaying for your NYC renovation
NYC Renovation Questions: What should I ask when checking my contractor's references?
Can't afford/find a two bedroom apartment? The right one-bedroom just might work
NYC Renovation Questions: What should I know about converting a tub to a walk-in shower?


